
Food Storage
We work countless hours to grow and harvest our own food, so of course we get a little nutty when we get into food storage. Our goal is to reduce our reliance on store-bought food by preserving what we harvest. You can do the same if you don’t have garden space by purchasing in bulk at a local farmers market or even auction and store your food the same way. We are going to talk about our 3 main types of food storage, Canning Food for Storage, Freezing Food for Storage, and Dehydrating Food for Storage. We share our tips and tricks, equipment used and of course epic failures along the way.
Canning Food for Storage

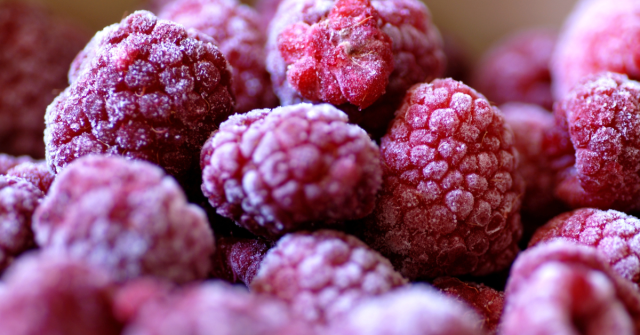
Canning food for storage is a culmination of all the hard work we did all spring and summer growing food, now we need to get everything we are harvesting put up for the upcoming winter and spring. People have been canning food for a long time and it is still the best way to preserve flavor and nutrient density for fruits, vegetables, berries and even some meat. Plus, what a feeling, knowing you can eat for a year off the shelves you just stacked. I’d probably toss bulk dry food storage into the mix also, even lots of that is purchased.
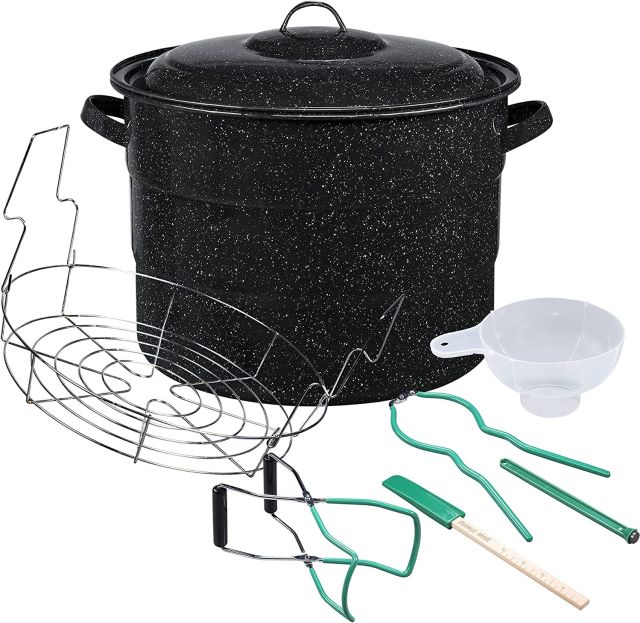
Equipment for Canning Food
Canning Jars: Choose the right sizes for accommodating different types of food and serving sizes. Make sure they are made for canning. Also, don’t forget, do not reuse the lids. Maybe a good idea to have extra jars, lids and rings around. Remember what the WuFlu did to the supply of jars and lids?
Pressure Canner and Water Bath Canner: Yes you need both. Can’t can my french style green beans or peas without a pressure canner. Then it’s onto the water bath side for canned peaches, jams and pickles.
Canning Gadgets: I am a gadget-a-holic. But in this case some things are 100% essential. Jar lifter, funnels, ladles, racks, tongs and spatulas.
Thermometer and Timer: You most likely have these already laying around the house, but if not they are a must. Temperature and time are critical variables when canning. Plus, without proper time and temp, your hard work can make your family sick.
Dry Good Bulk Storage Containers: Yes, I know, not technically canning. Bulk dry storing food can be done in large canning jars. But we like either 5 gallon buckets, food grade bins or fancier Tupperware like bins.
Tried-and-True Canning Tips
- Use Fresh Fruits and Veggies
- Clean and Sanitize Your Canning Equipment
- Preheat Jars When Necessary to Eliminate Breaking
- Follow Your Recipes – Measurements, Temperatures and Time
- Fill Jars to Appropriate Level – Wipe Rims, Secure Lids and Bands Tightly
- Use the Correct Canner – Low Acid: Pressure. HIgh Acid – Water Bath
- Let Cool for 24hrs, Label Processing Date and Special Notes
Storage Location & Environment Conditions
Storage Location: Canning food for storage does require them to be stored in a cool, dry, and dark place. A pantry, basement or root cellar will suffice.
Temperature: Try to have your canned goods in a stable temperature. Aim for between 50-70 degrees, but concentrate more on eliminating fluctuating temperatures.
Humidity: Humidity is not as important since your food is not exposed to the outside environment. However, a humidity level of 50-60% will help with preventing rust and mold on jars and lids.
Organization: First in, first out. Make sure older dated items are getting used first. Take some time to arrange jars by date and contents. Do inventory checks every so often and remove any items with popped lids or “expired” dates. This also lets you stay on top of what food you actually have left.
Freezing Food for Storage

Freezing food for storage is like creating your own Frozen Food section, but in your own home! We have harvested our fruits and vegetables, butchered our meat or processed our wild game. Now What? Let’s get this food in the freezer of course. Freezing food is very simple and helps retain nutrients and flavor. One exception, if you’ve just harvested a deer, the backstrap should be dinner and not be put in the freezer… yum.
Tools and Equipment for Freezing Food
Before diving into the freezing process, you’ll need a few basic tools to get started:
Quality Containers: Invest in heavy-duty freezer containers to keep your soups, stocks and other liquids in the freezer.
Vacuum Sealer: Some might say a vacuum sealer is not mandatory, but for use it certainly is. A vacuum sealer removes air from bags or containers, reducing the risk of freezer burn and extending the shelf life of your food. Plus it will flatten out items making more available space.
Permanent Markers and Labels: You absolutely need to label your food, What it is, when it was frozen and any other information you want to write down.
Cutting Boards and Knives: Chopping, dicing, slicing. I can see the food flying now. Just like when butchering knives are one of your most important tools. Chopping veggies and fruit prior to storage is a must as portioning out our meat.
Freezer Paper or Wax Paper: Do your part to help stop freezer burned meat. Buy freezer paper. All joking aside, freezer paper does help reduce freezer burn. Plus, putting wax paper between your hamburger patties will definitely help separate them when the time comes.
Freezing Food for Storage Techniques:
Blanching: Similar to the sauna / ice bath process for humans, but with a different intent. Drop veggies in boiling water, then move to ice-cold water to stop the cooking process. This helps preserve color and texture when freezing vegetables for storage.
Flash Freezing: No more clumps of frozen fruits or vegetables. Freezing them on a tray first and then putting them into your vacuum sealer will help them not stick together when it’s time to use them. This works well for berries, sliced fruit, and chopped vegetables.
Pre-Freezing: Portioning out soups, stews and stocks prior to freezing can be extremely helpful. You can use ice cube trays or plastic containers to freeze portion sizes. Then simply transfer them to a vacuum sealed bag.
Freezers and Freezer Types:
Upright Freezers: These freezers resemble a refrigerator and can help with limited space. They are however easier to use to keep track of inventory since you can see all your frozen goodness simply by opening the door. Downside is every time you open the door all the cold air escapes.
Chest Freezers: Large capacity chest freezers are the workhorse freezers for our family. They let us store a ton of items. They are more resilient when we have short power outages, but we are always ready with the generator. One “Con” of a chest freezer is that it is harder to keep organized.
Walk In Freezers: We are not there yet, but how awesome would it be to have your own walk in freezer? Age your own meat, have a perfectly organized frozen food section, eliminate the need for ice baths (FU Win Hof). Two major reasons so few people have these types of freezers for freezing food is; Cost & Space.
Dehydrating Food for Storage

Dehydrating food for storage is another effective way to extend the shelf life of our harvest. We have not really used this method for veggies, but dehydrated herbs as well as fruit and berries is awesome. This is also our preferred method for doing jerky.
Essential Equipment
Everything takes equipment. To dehydrate food effectively, you’ll need a few things.
Food Dehydrator: I know, duh. A food dehydrator to dehydrate food, who would have thought. Are there other ways, yes. But, the dehydrator is the most consistent method for dehydrating food for storage. They distribute heat and circulate air to remove moisture. Tons of options available for every size and budget.Sharp knives and cutting boards: Uniformly sliced food dehydrates more evenly, so invest in sharp knives and sturdy cutting boards to help you achieve consistent results.
Mandoline Slicer: Uniformity matters here. In order to get the same thickness on what you are dehydrating a mandoline slicer is the best tool for the job.
Meat Slicer: Just like the mandoline slicer above, uniform thickness is important when making jerky. This way all pieces in the batch are done and done at the same time. It is a royal PIA having to evaluate each piece for doneness.
Vacuum Sealer: Whether it is bags or airtight containers, it is essential to keep air away from your dehydrated food to ensure freshness and prevent spoilage.
Labels and Markers: Yes, we always need labels and markers, but I have to keep writing it. Part of dehydrating food for storage is to clearly label your containers and bags. You must track the dates and contents of your food inventory.
Dehydrating Food Techniques
Clean Thoroughly: It is always a good idea to clean your fruits, vegetables, and herbs to remove any dirt or residue, and pat them dry to reduce drying time.
Slice Uniformly: Thin, even slices will dehydrate more consistently and at the same rate, ensuring better results. Different thickness is the mortal enemy when dehydrating food.